
Once L-studio has been installed,
you can start it by double-clicking the L-studio icon ![]() . You will be presented with a splash screen, then the L-studio
main window:
. You will be presented with a splash screen, then the L-studio
main window:
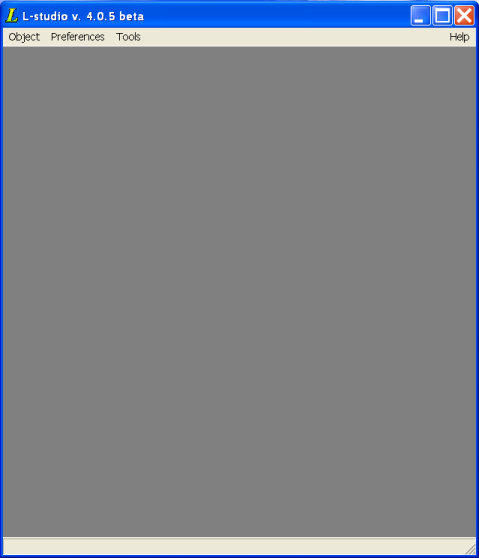
When you start L-studio, there are no objects loaded. There are three ways to open an object: by choosing Open from the Object menu; by dragging an object directory from the Windows file explorer and dropping it onto the L-studio window; or through the object browser.
Let's open an object. Select Open from the Object menu. This brings up the Open dialog box:
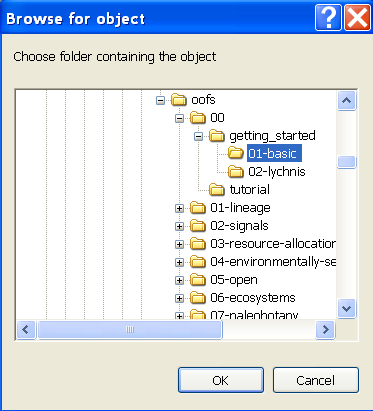
Browse through the directory tree to where you copied the oofs directory. (It's usually within the main L-studio directory.) Within the oofs directory, browse into the directory 00, then into the subdirectory getting_started, then select the directory 01-basic. Select OK. This opens the object in L-studio:
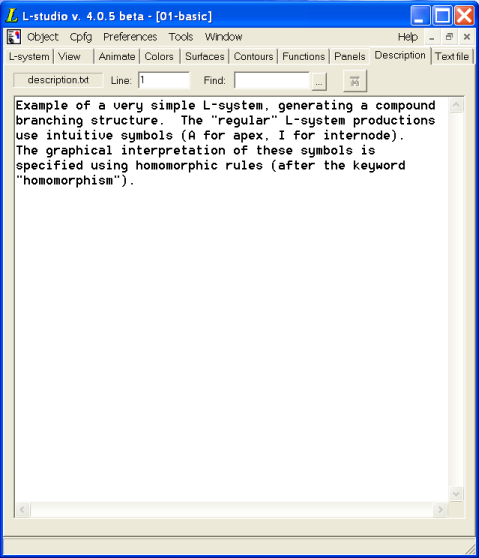
Notice the tabs at the top of the window. With these tabs, you can switch between L-studio's editors. The object 01-basic opened with the Description tab open, displaying the file description.txt, which is a description of the object. If an object has no description.txt, L-studio will open to the L-system tab.
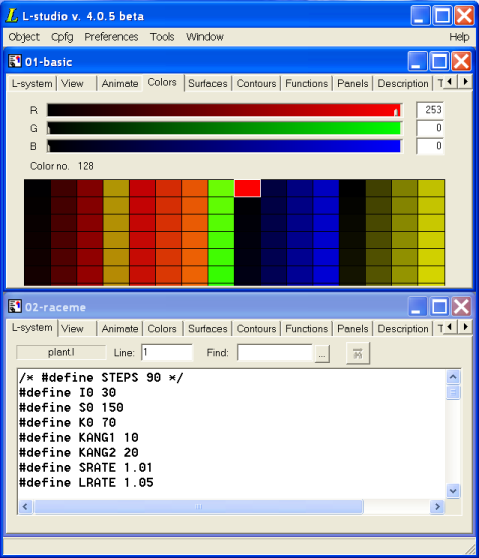
L-studio can have more than one object open at a time, using Microsoft's Multiple Document Interface methodology, which may be familiar to you from other Windows applications. Select Open from the Object menu, then open the object 02-lychnis, in the same directory as the last object you opened. Now two objects are open in L-studio at the same time:

You can arrange the object windows manually, just as you would windows on the desktop, or with the options in the Window menu. For instance, windows can be tiled horizonally:
Note: Some of the editors do not resize well. If the windows containing them are too small, you may not be able to see the entire editor, and may be unable to access some controls unless you increase the object window's size.
You can run the simulator for this object (in this case, cpfg) by choosing Go! from the Cpfg menu. This will open the cpfg window and run the simulation:
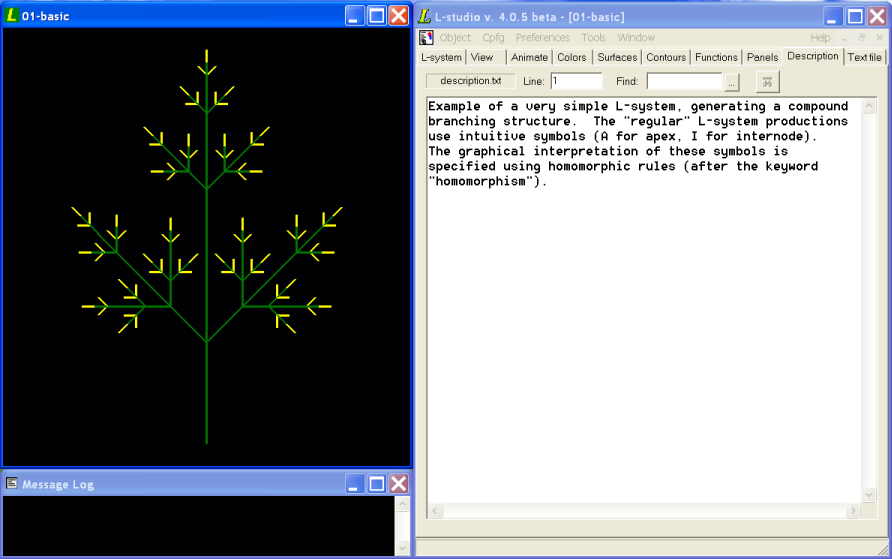
The model is shown in the main cpfg window. You can click and drag in this window to rotate the model. Right-clicking brings up a menu with other options. For more information on cpfg's interface, see the CPFG user's manual. The Message Log window below the main cpfg window shows all of the messages generated by cpfg: errors, warnings, and messages specified within the L-system file.
You can edit the model with any one of the built-in editors, which can be selected with the tabs at the top of the window:
First, try changing the color of the model. Select the Colors tab in L-studio. This displays the colormap editor:
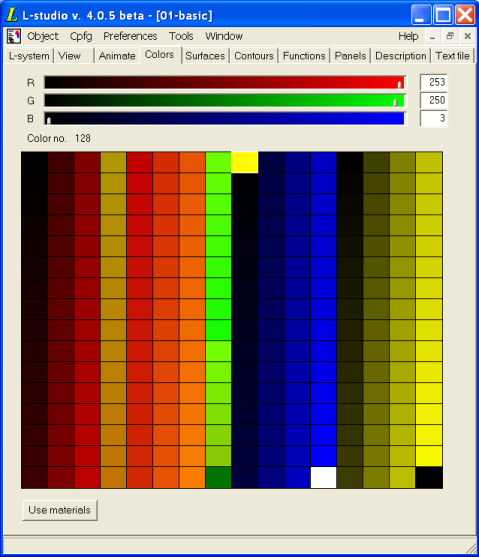
Select the bright yellow color from the top row, near the middle of the palette. The three sliders above the palette show the amount of red, green, and blue in the color; yellow is made up of almost full red and green, and almost no blue. Change the color to red by dragging the green (middle) slider all the way to the left:

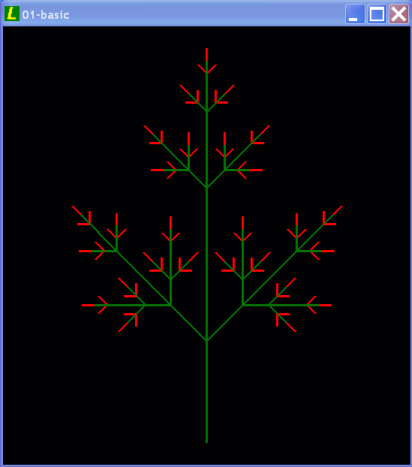
To apply changes to the simulated model, it is not necessary to close and rerun the simulator. The commands New model, New L-system, and so on, on the Cpfg/Lpfg menu signal the simulator that some aspect of the model has changed, and the simulation should be rerun, or at least the 3D view redrawn. Apply the color change by choosing the command New model from the Cpfg menu. Now the apices are drawn as red:
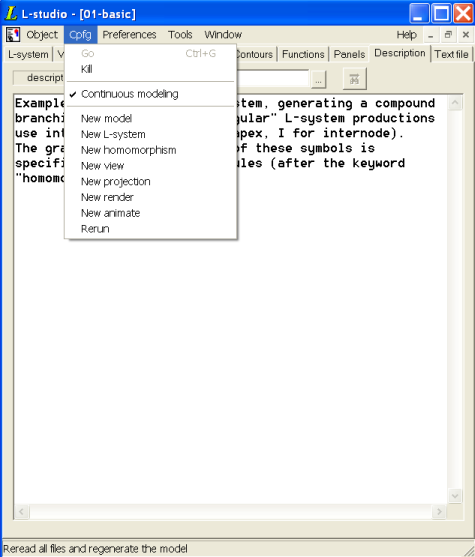
You can also edit objects in Continous modeling mode. In this mode, most changes that you make are immediately applied to the running simulation. Continous modeling mode is toggled by selecting the command Continuous modeling from the Cpfg menu. Make sure that Continuous Modeling is on now:
Now, change the red color back to yellow by dragging the green slider to the right. Note that the color of the apices in the model changes as you drag the slider.
01-basic is a very simple model. In the getting_started directory is a model of Lychnis which uses predefined 3D surfaces, functions, and panels. Select Open from the Object menu and navigate to the directory 00/getting_started/02-lychnis:
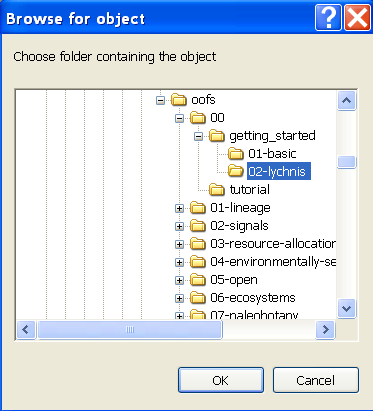
Select this directory, then select OK.
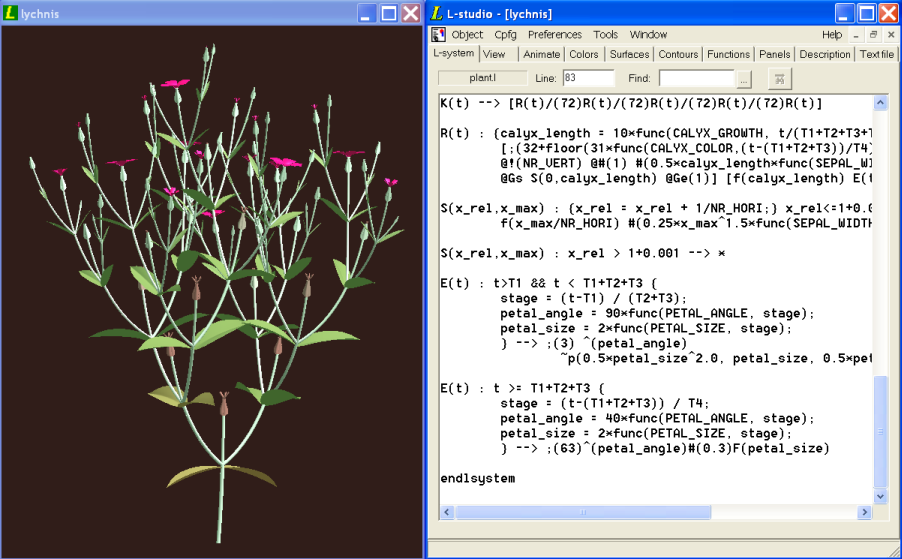
The basic model had only a few components: the L-system, a view file, an animation file, a description, and a colormap. The Lychnis model has many more: predefined 3D surfaces, graphically defined functions and contours, control panels, and uses materials instead of a colormap. These other components are accessed by the tabs at the top of the window:
Let's edit the model. First, make sure that Continuous Modeling mode is on. Open the Cpfg menu. If Continuous Modeling doesn't have a checkmark next to it, select it to turn it on. Then, run the simulation. Select Go! from the Cpfg menu. Now the Lychnis model should be shown in the cpfg window:
First, select the Colors tab to open the materials editor. Let's change the color of the flowers in the Lychnis model. Click on the pink sphere in the material palette to select that color:
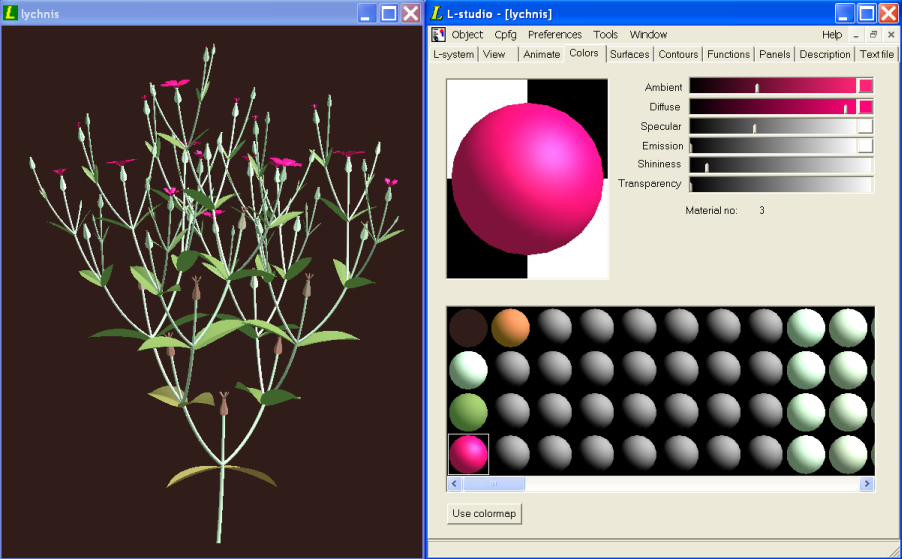
The material is defined by several components which are added together to create the color displayed. Briefly, the ambient color is added regardless of whether light is shining on the material or not; the diffuse color is its color when light is shining on it, and is darker if the light is not falling directly on it; the specular is the color of the material's "highlight", whose size is controlled by shininess; and the emission is the color of the light emitted by the material. Let's try changing the diffuse color.
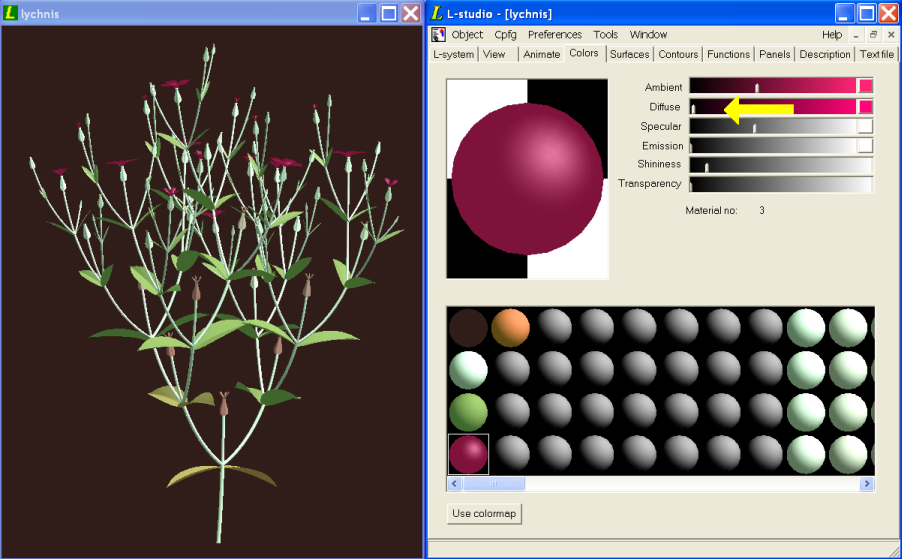
First, just change the amount of diffuse color added to the final color, by dragging the slider beside it all the way to the left. The sample material, and the color of the flowers in the simulation (because you have Continuous modeling mode on) changes to a dark burgundy:
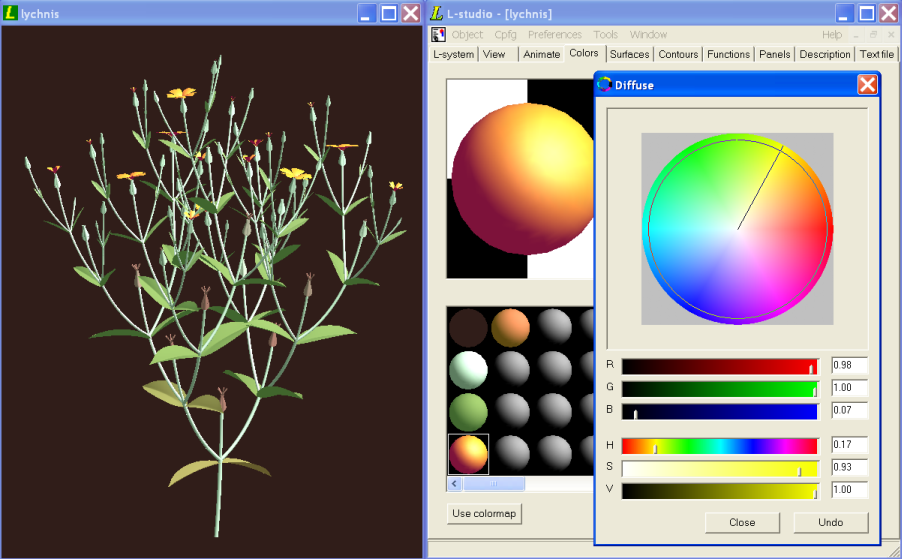
Now, try changing the diffuse color. Move the coefficient slider back to the right, then click on the box at its right hand side. This brings up a color editor:
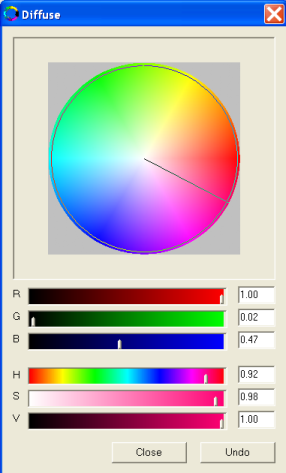
Let's change the color to yellow. Click on yellow on the color wheel, and notice that the flowers have changed color:
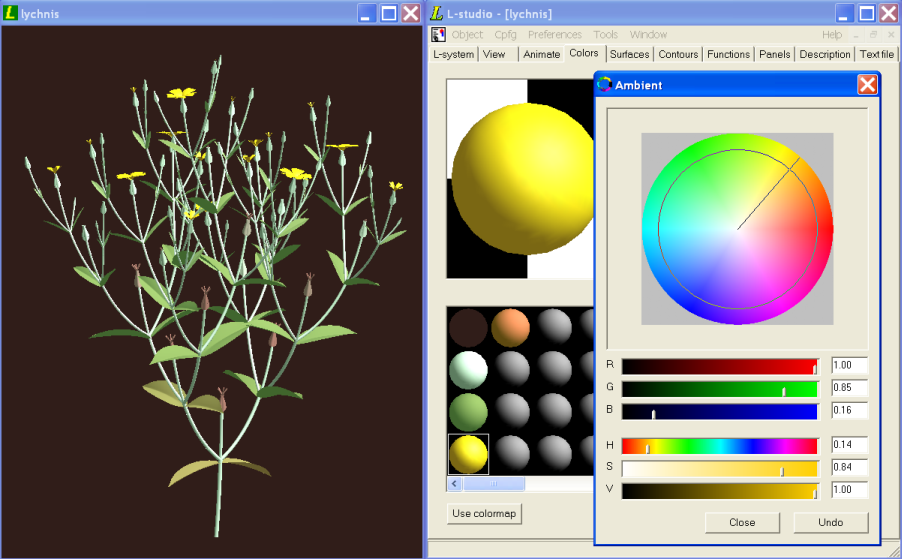
The flowers aren't quite yellow, because the ambient color is still pink. Close the diffuse color editor and open the ambient one, by clicking on the color square next to the ambient slider. Change the ambient color to yellow as well, and see that the flowers are now yellow:
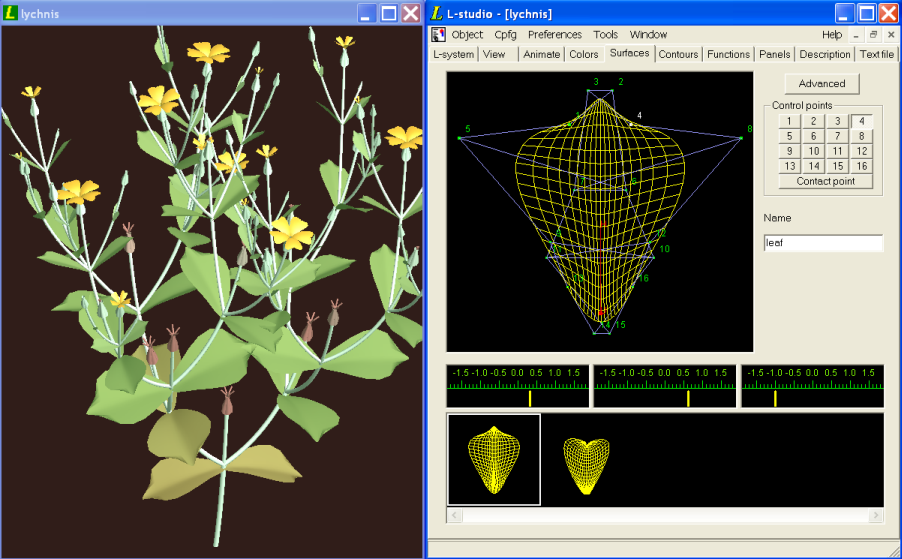
Open the surface editor by clicking the Surface tab:
There are two surface editors which let you create and modify predefined 3D surfaces. The "Advanced" editor is quite complex, but is not necessary for most models. The "Basic" editor, where you are now, is the editor that was used to create the surfaces in the model. To switch between them, use the Advanced button on the basic editor, and the Basic button on the advanced editor.
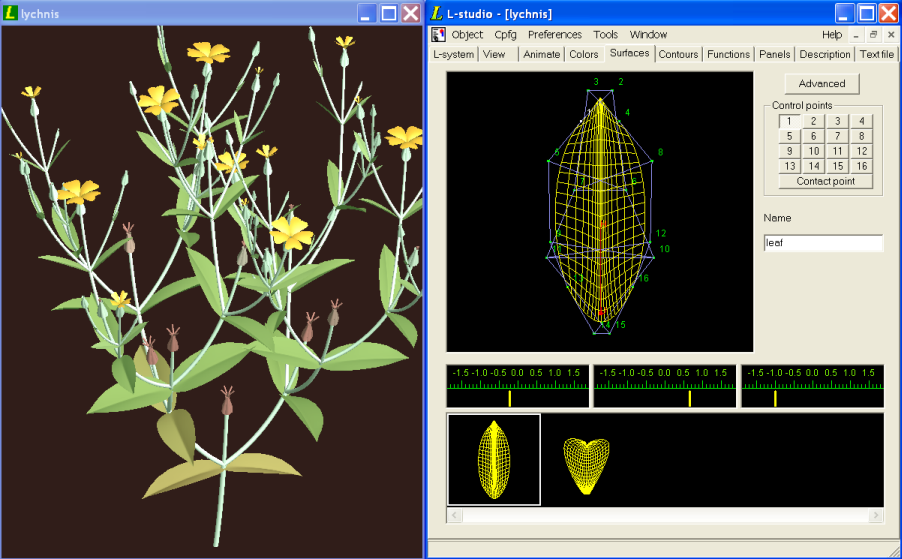
The surface, contour, function, and panel editors are all based on the gallery paradigm. All of the components of a given type (surfaces, contours, functions, or panels) are displayed in and can be selected from the gallery at the bottom of the window. When selected, the component is displayed in the preview window at the top left, and controls to edit it are displayed to its right. The component's name is shown in a text box to the right of the preview window. Select the leaf surface by clicking on it:
The leaf is displayed in the preview area. You can rotate the view by clicking and dragging on the preview area. Let's make the leaves broader. Right click on the preview area and select Lock XY design from the popup menu. This locks the view, so that clicking on the window will select and move control points, not rotate the model. Now right click again, and select Keep symmetric. This will make sure that as you move control points, the leaf shape is kept symmetric.
Now, click on the point labeled "8", then drag it to the right. Notice that point 5 moves correspondingly to maintain the leaf's symmetry. The new leaf shape is reflected in the model shown in cpfg:
Click on the Functions tab to open the function editor. The Lychnis model uses lots of functions to define parameters that are different in different parts of the model, due to position or age. The first function in the gallery controls the size of leaves as a function of age. Click on it to select it:

All functions are defined from 0 to 1. In this case, where the independent variable is age, the value of the function at 0 gives the size of the youngest leaves (those at the tip of the shoots), while its value at 1 is the size of the oldest leaves (at the very bottom of the axis). Try increasing the size of the youngest leaves. Drag the leftmost point (which is very close to the origin) up:
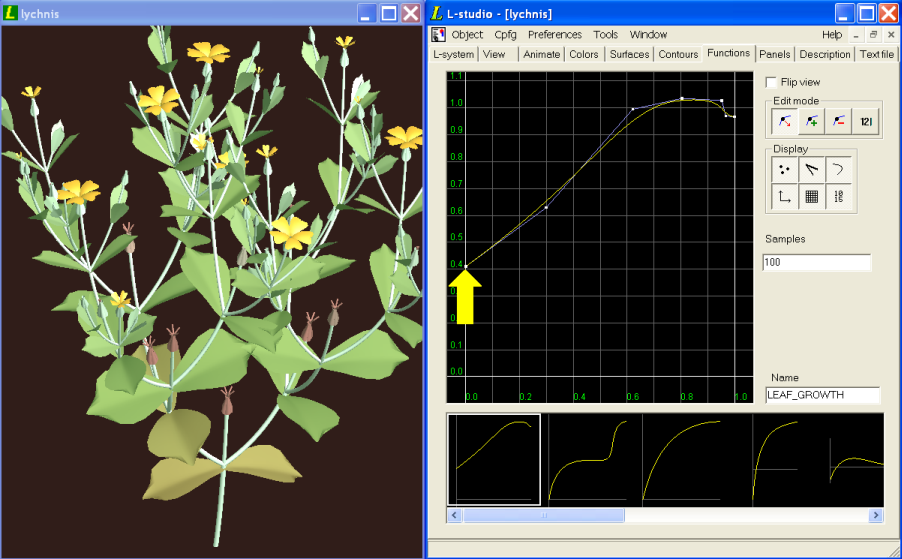
The increase in the size of the youngest leaves is quite clearly reflected in the model:

The panel editor is opened with the Panels tab:

Panels are used to control parameters while the simulation is running. The Lychnis model uses two panels: one controls L-system parameters, the other controls view options. Click on the "lsystem" panel in the gallery to open it:
There are lots of parameters to control in this model. Look at "Flowering time". This is the amount of time it takes for a flower to grow, once the bud has opened. If it increases, we expect what flowers there are to be found lower and lower on the plant, at older and older buds. Try increasing it by clicking in the bar above the label and see what happens:
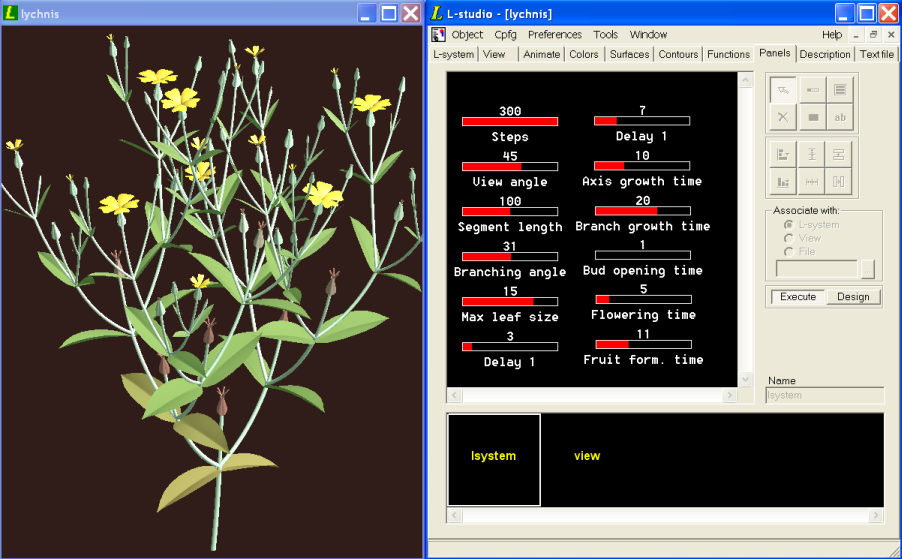
As expected, as we increase the flowering time, the flowers are found further down the plant stem. Experimenting with parameters in this way helps to confirm a model's predictions.